Imaging your Systemcore
For a Systemcore that boots normally and runs OS version 11 or later, routine
updates run through its web interface at robot.local. Older installations
and units that cannot boot use the recovery procedure later on this page.
Prerequisites
A
.llupdatefile downloaded from the Systemcore releases page. Make sure to download the alpha or beta update that matches your Systemcore unit.A Wi-Fi or USB connection to the Systemcore
The hardware revision (Alpha or Beta) and current OS version shown by the onboard display or web interface
Important
Update files are hardware-specific. Do not install an Alpha update on a Beta Systemcore or a Beta update on an Alpha Systemcore.
Alpha units shipped without port labels; Beta units have port labels. Confirm the hardware revision before selecting the update.
Routine Web Update
Download the
.llupdatefile for the current season from the Systemcore releases page.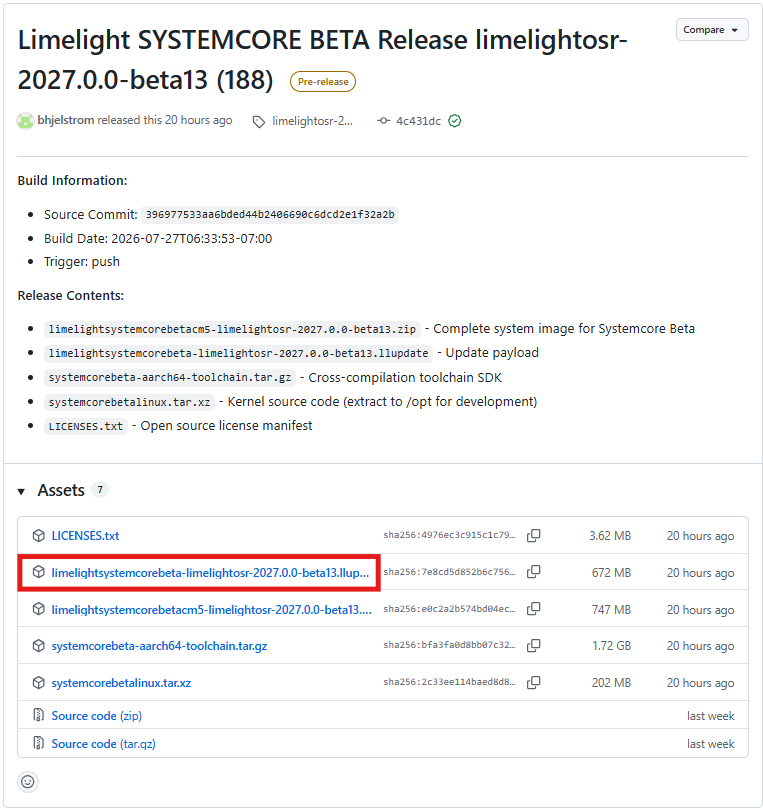
Boot the Systemcore normally. Connect over Wi-Fi, or connect a data-capable cable to the USB-C LINK port after an Alpha unit has started.
Open a browser and navigate to
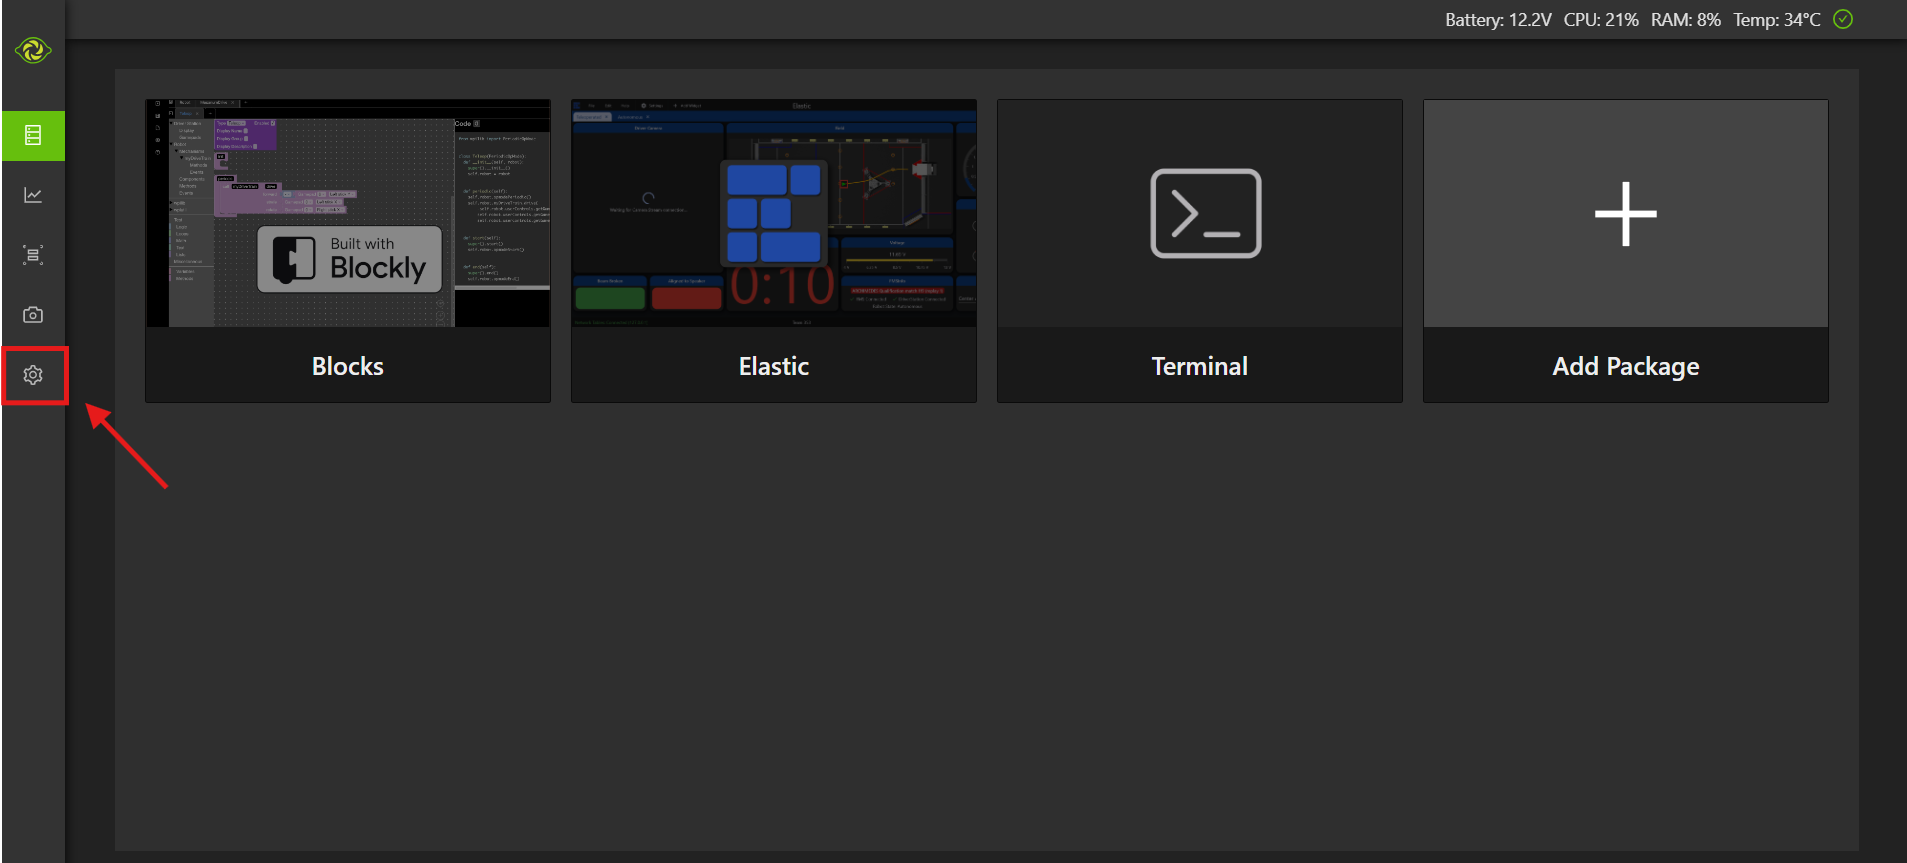
robot.local.Click the settings (gear) icon and open the configure/update section.
Under OS Update, click Select File, choose the
.llupdatefile you downloaded, then click Flash Update. The process takes several minutes to complete.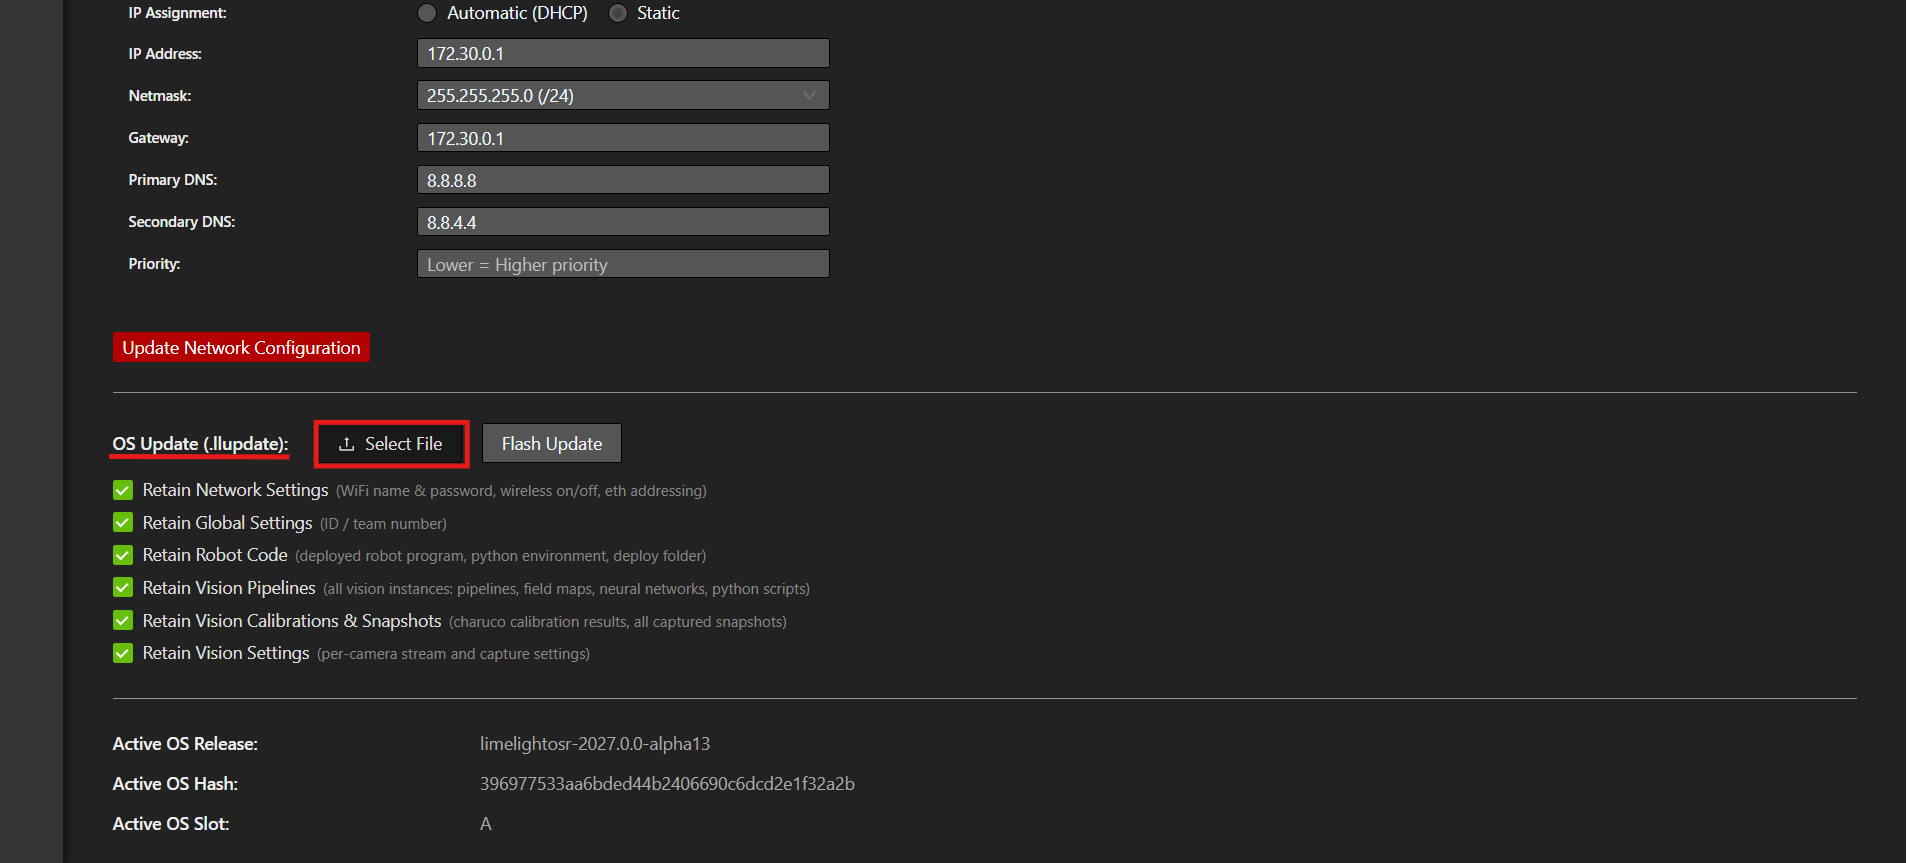


Once the update finishes, every step shows a check mark:

Note
USB connection: a success message appears once the update finishes.
Wi-Fi connection: the Systemcore reboots as part of the update. Manually reconnect and refresh the page to see the completion status.
Configure and Verify
After the update and reboot:
Reopen
robot.localand confirm that the displayed OS version matches the release you installed.Open the configuration tab, enter your team number, and click Change Team Number.
Confirm that the onboard display shows the correct team number.
Enter the same team number in the Driver Station settings.
Confirm that the Driver Station reports robot communication. A missing robot-code indicator is expected until code is deployed in Step 4.
If the Driver Station cannot connect, compare the team number on the Systemcore display with the number in Driver Station settings. When creating a project in Step 4, use this same number for deployment.
Recovery Flashing
Use recovery flashing when the Systemcore runs an OS version older than 11,
does not boot normally, or the release instructions specifically require a
full image. Recovery uses the Limelight Hardware Manager and a full .zip
or .img image, not the routine .llupdate workflow above.
From the Systemcore alpha/beta testing page, install the current Limelight Hardware Manager and download the full image for the correct hardware revision.
Open Hardware Manager and select its OS flashing tool.
Connect the USB-C LINK port and enter flash mode:
Alpha: turn robot power off, connect LINK, then turn power on.
Beta: connect LINK, hold the Config button, and turn power on.
In Hardware Manager, refresh the device list and select the device identified as Limelight/Systemcore. Never select a drive based only on its position in the list.
Select the full image and start the flash. Do not disconnect USB or robot power while writing is in progress.
When Hardware Manager reports completion, turn robot power off, disconnect LINK, and boot normally. Then complete Configure and Verify above.
Warning
Recovery flashing overwrites the Systemcore OS. Confirm the hardware revision, image file, and selected target device before starting.